Hop til indhold
  • Log ind
  • Opret konto
  • Varekurv
  • Gå til Kassen

Min Arduino

Ideer til undervisning med Arduino, Micro:bit eller ESP32

Søg efter:
0
TOTAL
  • Forside
  • Butik
  • Salgs- og leveringsbetingelser
  • Bøger
    • Kom godt i gang med Arduino
      • Om bogens indhold
      • Indholdsfortegnelse
    • Arduino, Android apps og Bluetooth
      • Om bogens indhold
      • Indholdsfortegnelse
    • Hjælp
      • Hjælp til download af programmer
  • P-1
    • Projekt 1A
    • Projekt 1B
    • Projekt 1C
    • Projekt 1C-2
    • Projekt 1D
    • Projekt 1D-2
    • Projekt 1D-3
    • Projekt 1E
    • Projekt 1F
  • P-2
    • Projekt 2A
    • Projekt 2B
    • Projekt 2C
  • P-3
    • Projekt 3A
    • Projekt 3B
    • Projekt 3C
  • P-4
    • Projekt 4A
    • Projekt 4B
    • Projekt 4C
  • P-5
    • Projekt 5A
    • Projekt 5B
    • Projekt 5C
  • P-6
    • Projekt 6A
    • Projekt 6B
    • Projekt 6C
  • P-7
    • Projekt 7A
    • Projekt 7B
    • Projekt 7C
    • Projekt 7D
  • P-8
    • Projekt 8A
    • Projekt 8B
    • Projekt 8C
    • Projekt 8D
    • Projekt 8E
    • Projekt 8F
    • Projekt 8G
  • P-9
    • Projekt 9A
    • Projekt 9B
    • Projekt 9C
  • P-10
    • Projekt 10A
    • Projekt 10B
    • Projekt 10C
    • Projekt 10D
  • P-11
    • Projekt 11A
    • Projekt 11B
  • P-12
    • Projekt 12A
    • Projekt 12B
    • Projekt 12C
    • Projekt 12D
    • Projekt 12E
  • P-13
    • Projekt 13A
    • Projekt 13B
    • Projekt 13C
    • Projekt 13D
  • P-14
    • Projekt 14A
    • Projekt 14B
    • Projekt 14C
    • Projekt 14D
    • Projekt 14E
  • P-15
    • Projekt 15A
    • Projekt 15B
    • Projekt 15C
    • Projekt 15D
  • P-16
    • Projekt 16A
  • P-17
    • Projekt 17A
  • P-18
    • Projekt 18A
    • Projekt 18B
  • P-19
    • Projekt 19A
    • Projekt 19B
    • Projekt 19C
    • Projekt 19D
    • Projekt 19E
  • Internet of Things (IoT)
    • Setup af D1 og D1 mini boards
    • Blink program på D1 eller D1 mini board
    • D1/D1 mini boards som webserver
    • D1, DHT11 sensor og ThingSpeak
    • D1 mini, DHT11 sensor shield og ThingSpeak
    • Test af D1 mini board med relay shield
  • Andre projekter
    • Måling af fugtighed i jord (tal/procent)
    • Manuel vanding
    • Automatisk vanding med en lille pumpe – Arduino UNO
    • Automatisk vanding med større pumpe
    • Prank Box
    • Ohmmeter
    • 12C Scanner
    • Rullende tekst med LCD1602
    • Digital lineal med LCD
  • Byg en bil (N/T)
  • Temperaturmålinger
    • Kontaktløs temperaturmåling
    • Temperaturmåling med DS18B20 (vandtæt sensor)
    • Temperaturmåling med TMP36
  • Power på robotbiler
  • BBC micro:bit
    • BBC micro:bit og servomotorer
      • BBC micro:bit og en servomotor (0-180 grader)
      • BBC micro:bit og to servomotorer (0-180 grader)
      • BBC micro:bit og en servomotorer (0-360 grader)
      • Ekstra menupunkt med nye blokke
      • BBC micro:bit og en servomotor (360 grader)
      • Micro:bit og to servomotorer (360 grader)
    • Micro:bit robotbiler
      • Robotbilen “Alfa-1” til Android
      • Robotbilen “Alfa-1” til iPhone
      • Robotbilen “Alfa-1” styret af en micro:bit
      • Line Follower Robot “Alfa-1a”
      • Robotbilen “Alfa-2” til Android
      • Robotbilen “Alfa-2” styret af en micro:bit
      • Line Follower Robot “Alfa-2a”
      • Robotbilen “Alfa-3” styret af en micro:bit
    • Anvendelse af lyssensor til micro:bit
    • Anvendelse af temperatursensor til en micro:bit
    • Automatisk vanding med micro:bit
    • Anvendelse af afstandssensor til micro:bit
  • Micro:bit radio control
    • Tænde og slukke LED med en ekstra micro:bit
    • En micro:bit styrer trådløst en DC motor
    • Micro:bit fjernstyrer servomotor
    • Micro:bit fjernstyrer trådløst to servomotorer
  • Arduino IDE og micro:bit
    • En micro:bit styrer trådløst en DC motor
    • Anvendelse af vandtæt temperatursensor til micro:bit
    • Kontaktløs temperatursensor til micro:bit
  • Micro:bit både
    • Hjuldamper styret af micro:bit
    • Motorbåd styret af en micro:bit
    • Speedbåd styret af en micro:bit

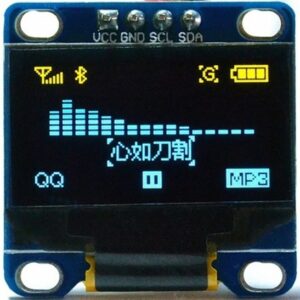
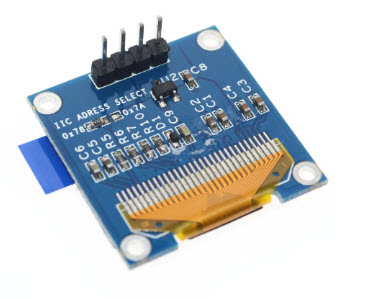
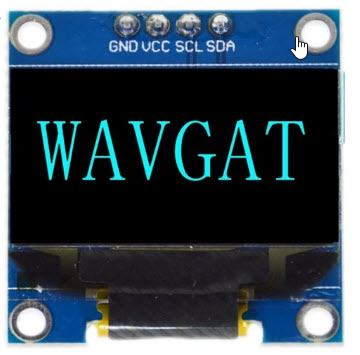
0.96″ Display Module I2C SSD1306 IIC SPI Serial 128X64 OLED (4 pins – Blue)

45,00 DKK

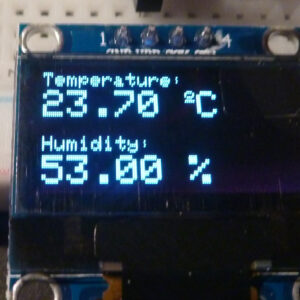
Velegnet til mange Arduino projekter. Se Anvendelse af OLED-Display til Arduino UNO og Vis temperatur og fugtighed på OLED-Display med Arduino UNO.
Se også “Anvendelse af OLED-Display til Micro:bit“

På lager

Varenummer (SKU): D567 Kategori: Displays
  • Beskrivelse

Beskrivelse


Velegnet til mange Arduino projekter. Se Anvendelse af OLED-Display til Arduino UNO

Se også “Anvendelse af OLED-Display til Micro:bit”

What is OLED?

OLED (Organic Light-Emitting Diode) is a self light-emitting technology composed of a thin, multi-layered organic film placed between an anode and cathode. In contrast to LCD technology, OLED does not require a backlight. OLED possesses high application potential for virtually all types of displays and is regarded as the ultimate technology for the next generation of flat-panel displays.

The use of OLED technology offers the following advantages for flat-panel displays?
1. A simplified manufacturing process compared to TFT-LCD (See comparison of Picture 1 and Picture 2 below)
2. Self-emitting light, in contrast to the required backlight for TFT-LCD
3. High luminosity
4. Lightweight and thin (less than 2 mm)
5. Capable of wide viewing angles?~180??
6. Low operating voltage and power consumption
7. Quick response (~ ? second level)
8. Wide range of operating temperatures (-40c to 85c)

A Comparison of OLED and TFT-LCD Display Technologies

How Does OLED Emit Light?
OLED”s basic structure consists of organic materials positioned between the cathode and the anode, which is composed of electric conductive transparent Indium Tin Oxide (ITO). The organic materials compose a multi-layered thin film, which includes the Hole Transporting Layer (HTL), Emission Layer (EML) and the Electron Transporting Layer (ETL). By applying the appropriate electric voltage, holes and electrons are injected into the EML from the anode and the cathode, respectively. The holes and electrons combine inside the EML to form excitons, after which electroluminescence occurs. The transfer material, emission layer material and choice of electrode are the key factors that determine the quality of OLED components.

Note: If you decide to buy OLED display, you must confirm that you can make it work by yourself, we’ll haven’t any technology support except all the datasheet. Thanks for your understanding and support.

Needn’t backlight, the display unit can self-luminous
High resolution: 128 * 64
Viewing angle:> 160 °
Supports many control chip: Fully compatible with for  Arduino, 51 Series, MSP430 Series, STM32 / 2, CSR IC, etc.
Ultra-low power consumption: full screen lit 0.08W
Voltage: 3V ~ 5V DC
Working Temperature: -30 c ~ 70 c
Module Size: 27.0MM * 27.0MM * 4.1MM
I2C/IIC Interface, need 2 IO only.
Driver IC: SSD1306


Relaterede varer

  • 0.96″ Display Module I2C SSD1306 IIC SPI Serial 128X64 OLED (4 pins – White)

    45,00 DKK
    Tilføj til kurv
©2022 Min Arduino | All Rights Reserved